Monday, December 31, 2012

BDA Progress 6 - The rest of it

Tada! Base colors in. I'm going to skip details (texture, belt buckles, etc) and go to Vertex Weighting. Not having a busy texture will help me see what's going on (admittedly, so will hiding the texture from viewports or removing the texture altogether) and I don't want to get too far into the texture and realize I have to do some major overhaul just to make deformations work.

The plan is to SkinWrap the Skyrim female_0 body and make various parts rigid. I may need to assign the tassets to skirt bones by hand though.

26,634 polygons now. I added some more details to the greaves

Sunday, December 30, 2012

BDA Progress 5 - Helmet


I spent about two hours on the torso today. I originally had the torso as a front and a back stitched together on one side. While it looked good, the relax tool wouldn't produce straight lines; everything was skewed towards the side stitch. So, I split the torso into 3 pieces: Front, Back Left, Back Right. From there, I pelted and relaxed them individually. Then I target welded them together, relaxed the entire piece, and fitted it back into the existing UV maps for the other pieces.

The only piece I have left to do on the torso is the thigh. I still need to find a whole Bioware dragon logo.

The helmet is done for this stage. It wasn't very complicated and only took about half an hour to get the pieces in. The hands are next.

I am definitely not looking forward to reshaping this to fit the _1 body. There's also the issue of Glow Maps disallowing Specular Maps. For the helmet, this isn't a problem. Not so for the chest. Those 6 rectangles are in texture, not geometry. So, I'll have to either a) cut the rectangles out as geometry but leave them flush or b) not have a specular map at all.

Oh right, I'll have to recreate some, if not all, of the armor for the male version as well...ugh. I could use the SoMuchMorpher tool to automate pretty much everything above (rigging and body shape changes), but the last time I did that, I wound up reweighting everything by hand. I'll probably use it to morph from 0 to 1 and then Skin Wrap from 0 to preserve weights (not sure about the weighting).


-------------------------

So many "Dragon Age" and "Skyrim" posts...

Saturday, December 29, 2012

Blood Dragon-ish Armor - Progress 4 - Solid Details


I have most of the basic details for the torso done. The Bioware Dragon will come later as I'll probably trace it as a vector so I can scale it up.

Note to self: Large angles + few polygons = obviously distorted texture. Small angles + too many polygons = obviously distorted texture. See the pauldrons (large angle) and lower hip plates (small angle) for examples.


I mentioned UV Unwrap problems in my last post and, well, they struck again. Look at the center angled rectangles and compare them to their neighbors. They are being rotated counter clockwise and translated until they meet or pass the UVs for adjacent polygons. As that line became progressively smaller, the amount of distortion grew (some UVs even twisted themselves). To correct it, I had to drag each UV vertex to its proper position and delete some stacked polygons (no idea how they were made).

Friday, December 28, 2012

Blood Dragon-ish Armor - Progress 3 - Unwrapping


I've finished unwrapping all the pieces of armor and merged all the torso pieces into one object. Right now, I'm applying base colors on the main body of armor to get a better idea of what the armor will look like.

The current torso texture resolution is 2048x4096, twice the size of the original (instead of 4-8x like with the weapons). The entire armor set is about 26,000 polygons; not bad.

There's a lot of UV stretching that I don't like for nearly all the pieces. My UV unwrap process goes like this:
  1. Add Unwrap UVW Modifier
  2. Manually create seams
  3. Select each section of polygons (Select one polygon, expand selection to seams)
  4. Pelt
  5. Relax by Face Angles
  6. Adjust if needed
This usually works and gives great layouts, but in some cases relaxing by either Edge or Face angles causes vertices to overlap or implode into nothingness. When that happens, I have to cut objects into more pieces than I'm comfortable with due to how much work it'll be to make them seamless later on. For the pauldrons, I had to add some seams and delete some unnecessary edges because they were throwing the algorithms for a loop.

Wednesday, December 26, 2012

Odds and Ends

Steam just tried to redownload all of Fallout: New Vegas for no reason. It didn't even check for integrity first. It just went "Well, gotta download all 9.2GB again". After stopping it and invoking an integrity check manually, it hit 100% completion and stayed incomplete for a bit, then came to the conclusion one file had to be downloaded (most likely the one it was trying to download), and downloaded that file in about 10 seconds.

--------------------------------------

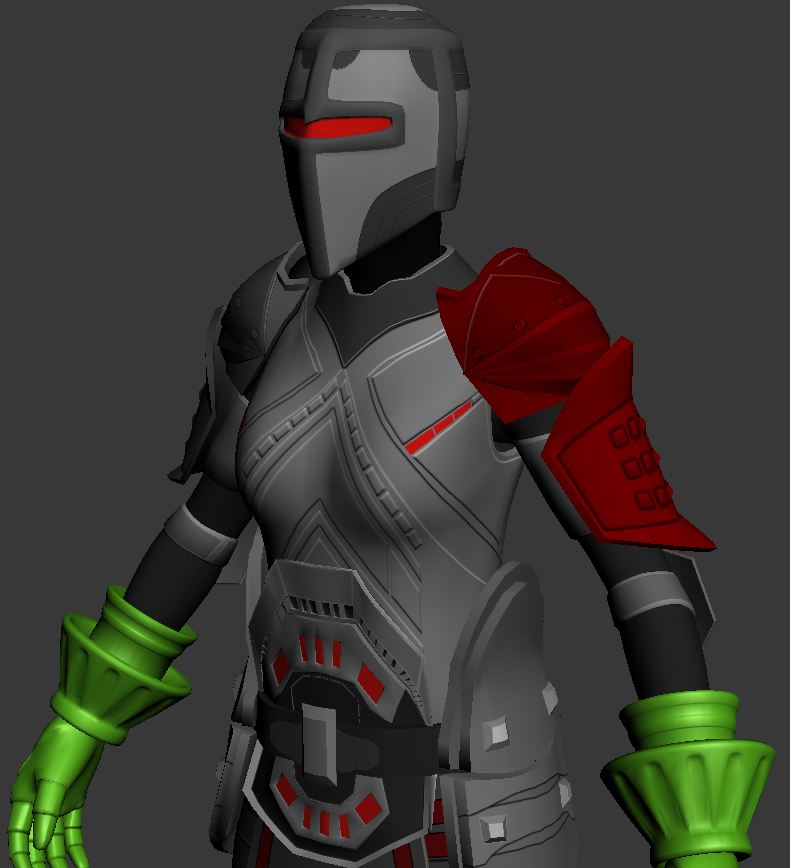
I've trimmed 5k polygons off of the Blood Dragon Armor and added a belt. No new screenshots as you probably won't see where the polygons were cut (unless I used wireframe or edged faces, and even then, barely) and the belt is only visible from certain angles due to all the plates obscuring it.

It's about time to start unwrapping.

--------------------------------------

I found a fun group on Borderlands 2 (PT2.5) several days ago and we opted to take on all the raid bosses. We managed to kill Vermivorous, Terramorphous, and Pete without much trouble (Vermi was a pain to create) but Hyperius and Master Gee were ridiculous (everyone died within 15 seconds while spread out). So, we decided to make ourselves immortal (instant second winds) just complete the set.

Terra, Pete, and Vermi weren't too bad. Pete's annoying because of his near unavoidable novas, Vermi just has ludicrously high HP, and Terra, well, he's a bit better after the Bee nerf patch. They gave okay loot (a green or two, half a dozen blue and purple). Nothing to write home about and just enough to recoup ammo costs (except Terra, who drops tons of ammo anyways).

Hyperius and Master Gee are way too overpowered and take forever to kill. Even with immortals, it took 15 minutes of continuous fire from Infinity Pistols to kill them. Loot? A dozen Seraph crystals, a single blue, a single purple, a couple greens, and, if I remember correctly, a white. Barely enough loot to buy 12 rocket ammo.

Seraph gear is supposed to be the next step below Legendary, so you "farm" crystals and wait for something good to show up at the Market. Still not worth it. Why? The cost of the items is greater than a single run through the Guardians. At least Pete is available more than once a day (for now).

I don't even like the Seraph items anyways. Legendaries and some E-tech/purples hold more visual appeal and, in some cases, better stats/utility than them anyways. Anyways, by the time you get to the point where you can take on these bosses, your gear is already better than what you could buy after you kill them enough times; effectively making the whole process pointless (not to mention how comfortable you are with your gear now).

So, what's the point? You spend hours killing bosses that easily deplete your ammo, drop less than mediocre loot, and give you tokens to buy items that are even less stellar than some standard items. Maybe I merely hate the token system. "In addition to standard currency, you have the following [insert number here] other currencies which take [insert high number here] times as long to collect for items that are probably not better than what you had before. Oh, and you can't get more than [insert number] of them per day."

Conclusion: Raid bosses aren't worth it. For all that time and effort, you get next to nothing in return. "Oh, congrats, you just beat a really, really hard boss. Have a high fi...nevermind." On the plus side, Terra is still kind of fun.

Monday, December 24, 2012

Blood Dragon-ish Armor - Progress 2

Slight clipping on the right side due to local alignment on the Symmetry modifier

Well, there it is. Skyrim-fied Blood Dragon Armor. It is approximately 29,000 polygons. My next tasks are to correct MeshSmooth errors (2nd-3rd pass), harden edges, round out a couple components, and make sure the standalone pieces (gloves, boots, body, and helmet) have caps just in case players don't use the full set (no see-through joints). Once those are done, I'll start unwrapping.

---------------
Just listened to the Hellgate: London theme after forgetting about it for, probably, a few months. Ah, fun times. I still have the game install directories, but I'm not sure if the game is functional after migrating from XP. However, it gives me the "insert CD" prompt for singleplayer (promising).

Saturday, December 22, 2012

Torso Progress 5

I've made the collar, but the circumference is a bit too hard. Same goes for the, uhm, sleeve holes. The overall shape has also been changed to remove the form fitting curves it had last time.

----------------------------

The Witcher 2's bonus content was updated on Steam and it had some problems. First, the soundtrack is now 23 tracks in WAV format instead of 46 tracks in MP3 format (fortunately, I found a post that mentioned this as the update was downloading and promptly made a backup). Second, it deleted all downloaded content and downloaded EVERYTHING again (not the game, just the bonus content), resulting in a 2.8GB download. Third, all the bonus content folders are no longer in the "Bonus Content" subfolder (in fact, Steam tried to delete it), they're placed in the main game folder.

On the plus side, there's a whole bunch of high res artwork to look at.

Wednesday, December 19, 2012

Torso Progress 4


I forgot to post progress for a couple days. I've made the couters (elbow pads), the tassets (the mail that hangs around the thighs), and just started on the upper body.

The placement of the plackard plates isn't set yet. As you can see in the above picture, they don't fit the Skyrim body. Once I fill out the upper body's armor, I'll start adjusting the plates. This is partially why I opted not to add all the detail at once, too much to change later.

Monday, December 17, 2012

Torso Progress 3

This is the front plate of the plackard, despite its similarity to a badge.
The original mesh's UVs were off when I imported them. However, once I blew it apart into elements, there was a "backside" to the plate that had the correct UVs. All I had to do was offset it so I could trace my cuts over it (splines refused to start and if they did, every other point was on the furthest or closest y-axis point). The blue piece is about 1k polygons; the pink piece, 10 polygons.

Saturday, December 15, 2012

Torso Progress 2


Since there are different names for each piece, I'm going to lump them all into "torso armor" or "hip armor".

The armor is taking shape now. I have to extend the belt a bit until it hits the side panels and modify the turquoise piece's shape to have a better curve at the sides. From there, UV mapping to pull out more details.

Friday, December 14, 2012

Culet Progress

The hip panels aren't looking quite right when compared to the rest of the armor parts. I think I'm going to unwrap them into a shared texture, rough out the details in Photoshop, and cut those details out now instead of waiting until I've finished all the other pieces.

"$.mat = null" is handy for removing textures from objects. I had to look it up because I couldn't find a way to remove applied textures from objects. Sure, you can hide them in viewports, but I wanted them completely unassigned just to clean things up. I had to use this for the hands and feet because the greaves and gauntlets were built out of their respective body parts instead of from scratch.

Thursday, December 13, 2012

Poleyn Progress


I took a day off from working on the armor because I was called in to fix a label printer and decided I'd spend the rest of the day searching job postings. I'm working on the back of the plackard and a job application right now.

Tuesday, December 11, 2012

BDA - Overall Progress

What I've completed so far

Remaining pieces: belt, torso, couters, poleyns, tassets and the plackart.

I'm holding off on some details until I unwrap the pieces. That way, I can cut details relative to the texture instead of eyeballing it.

Monday, December 10, 2012

Pauldron and Gardbrace Progress


I've started work on the main body of armor. It consists of the torso and multiple pieces that attach to the body in panels. Fortunately, the pieces are all separated into elements that I can blow apart and work on one at a time.

The pauldrons (above, purple) are currently only the geometry I derived from the original's texture. The splines you see around them represent the outline of the original model and are adjusted to fit what I have.

On the gardbrace, the spikes are extruded out and a part of their backing. The original has each one as a separate set of 4 polygons rotated and placed intersecting the backing. I might adopt the original's method as my method creates a lot of supporting polygons. Now that the spikes have been extruded, I could separate them into their own elements, fill in the gaps, and delete the supporting geometry. This would save about 100 polygons and only become an issue if I wanted to change the underlying geometry.

I have not unwrapped any piece of armor because I think I'm going to have to cut down on the number of polygons. The finished armor will probably be 40k-50k polygons, but a full set of Daedric armor is about 10k polygons. For weapons, I like to keep under 10k, but I don't have an ideal target for armor.

Given how much work this is for the light female body, I think I'm going to only make modifications to fit the light male body instead of starting from scratch (Except for the main body). Doing that will also allow me to share textures between the sexes, cutting down on space usage. I'm thinking about 1024x1024 textures for the gauntlets, helmet, and greaves and 2048x2048 for the main body.

Sunday, December 9, 2012

Gauntlet Progress 3


7,000 polygons...yeah...I'm going to be cutting that down. Meshsmooth is great, but it creates a lot of unnecessary polys.

Given how dense the polygons are for each armor piece, I am really happy I have PSDPathUnwrapper. Export to paths, open in Photoshop, add a 2px border, and I'm in business. Of course, unwrapping this doesn't look like it'll be pleasant. I think I should go dust off Mudbox...

Saturday, December 8, 2012

Gauntlet Progress 2


The part in blue is the result of the rings from my last post. The wrist cone (Woo! Made up terms!) has 12 dips instead of the original's 13 because the circle splines I created were made with 20 points. I don't know how I got 12 from 20/2, but the geometry is sound, so I'm not complaining.

It has had two MeshSmooth passes: One on the entire object and another on the dips. It is currently 3000 polygons, but I can cut several hundred out in another reduction pass.

The purple hand is from Skyrim. I superimposed the cover from the original gauntlet, cut its shape out, and used a Face Extrude to bring it out a bit. Now is the hard part: fingers. Each knuckle has a raised cover, but I want them to flex properly, so I need to consider how I make them in relation to the joints.

Ideally, I do not want to hide any body parts when equipping this armor ingame because I want to allow mixing and matching with other sets without having Rayman-like gaps between limbs.

Friday, December 7, 2012

Gauntlet Progress

As mentioned before, Dragon Age's proportions differ from Skyrim's. In particular, female hands.

Dragon Age's female hands are the hands of nobles. Small, dainty, and perfect for soaring through the air en route to a face at Mach 1. So, a tapered, wooden dowel. By contrast, Skyrim's female hands are big enough to grab said face and crush it into Oblivion. In other words, a 2x4.


I can't get away with using the world coordinate system without rotating the camera to really odd angles like I could with the greaves. So, I created splines from edge selections of key areas on the original gauntlets, made spline circles, adjusted radii to match (more or less), and will string them together to create a more manageable shape that I can then instantiate and fit over Skyrim's body models. From there, I'll duplicate the hand, un-subdivide it, and build out geometry as desired.


Thursday, December 6, 2012

Greaves Progress

I started on the boots yesterday, but adapting their original design to Skyrim bodies is rather awkward. Skyrim has feet turned slightly outward, the knees aren't clearly defined, and the edge loops around the knees are at an angle instead of straight on. Making the main body of armor is going to be interesting...

I think I'm relying too heavily on meshsmooth. The helmet worked out well with untouched meshsmooth, but the greaves aren't looking too hot. I'm using the chamfer trick to make harder edges I learned from making Yusaris' crossguard wings. So far, it looks like I'm using around 3k polygons for each piece of armor. The helmet is 3k and both the greaves are 3k total. Gloves might be a little more due to fingers, but the cuirass might be 3-4x as dense due to the coverage area and details I'll be pulling out.

Essentially, the greaves are the original Skyrim body calves and feet, merged, un-subdivided, and scaled up to a size that would better reflect a boot's size. A lot of the medieval armor I've been finding have been rounded with few, if any, hard edges. It makes sense to not have hard edges (nothing to catch on), but ultra-smooth armor just looks, well, wrong. I'm trying to bulk the greaves up a bit to counteract that.

Wednesday, December 5, 2012

Helmet Progress

Well, this didn't take too long to setup. There were a few issues that popped up when applying symmetry, but overall it's working out well.


That's one version down, 3 to go. One for light male, one for heavy male, and one for heavy female. Because of the way weightsliding works (at least in Skyrim), I cannot recreate the model for the heavy versions. Every single vertex must stay the same aside from position. If I so much as change the number of vertices, I'm going to wind up with a porcupine skull ingame (if anything shows up at all).

I think I'm going to make each piece of armor have its own texture instead of one huge texture. Why? 1) Photoshop won't get bogged down as much and 2) The game will only load the textures it needs, not a huge texture for all the pieces (although if the player uses all of the pieces, this is a good thing).

Making armor...I think.

I haven't really tried making armor before. The closest I got was the Leather Duster and that was mostly auto generated via cloth modifiers (not too happy with all the triangles it made). So, this time I am going for it.

As usual, I'm cloning an armor set from the Dragon Age series. Why? I'm not comfortable enough to build armor from scratch and having an existing model to look at shows me how to construct good edge loops.